Example: once the LODs look right in the LOD Editor, the Benchmark tab shows them in use
— many animated instances, each drawing the level that fits its distance.
Make the Benchmark the only 3D view. If the Atlas Editor is docked beside the LOD Editor, its view
keeps rendering and lowers the measured frame rate. Keep the tabs in one row and select
Benchmark.
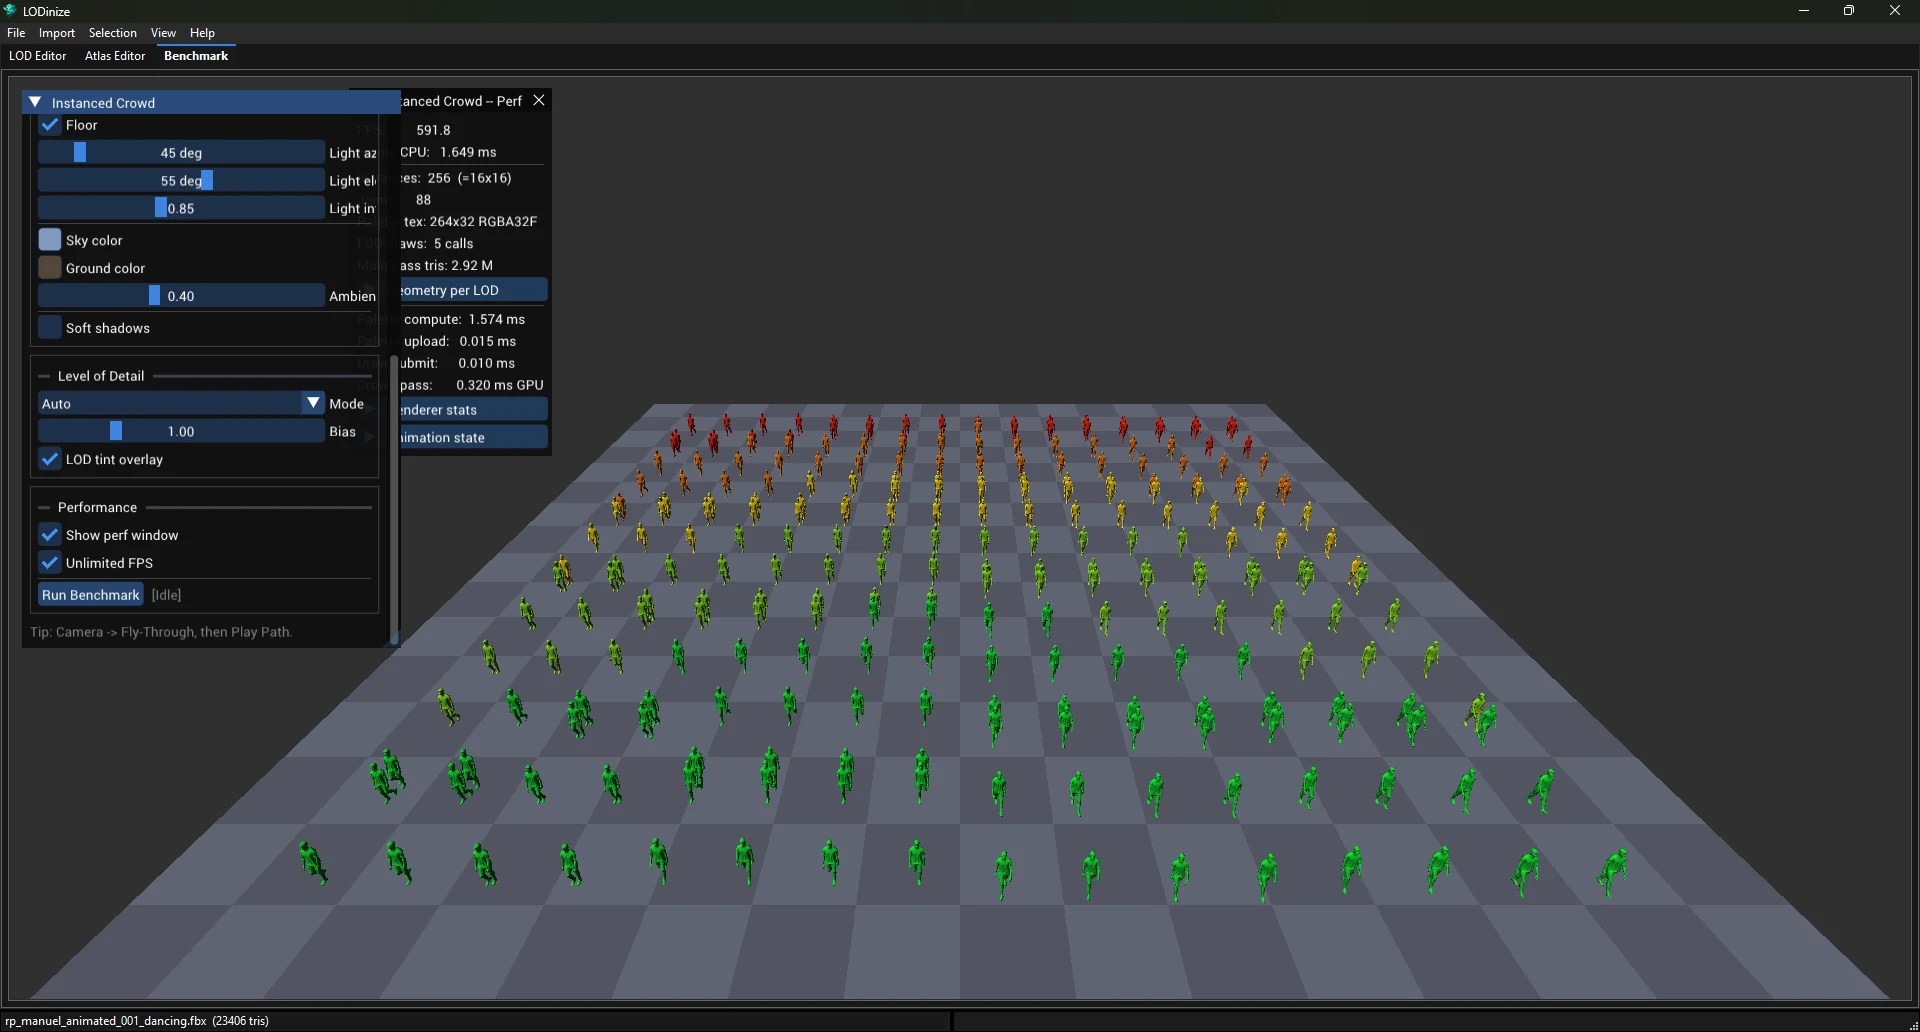
Start the crowd. Tick Running. The defaults show 256 instances (16 × 16),
textured, with soft shadows, while the camera flies through the crowd. With solid shading and no shadows the
sample character ran at about 590 FPS.
See which levels are used. Turn on LOD tint overlay: near instances use the detailed
levels, far ones the coarse ones. The Perf window lists instances and triangles per level.
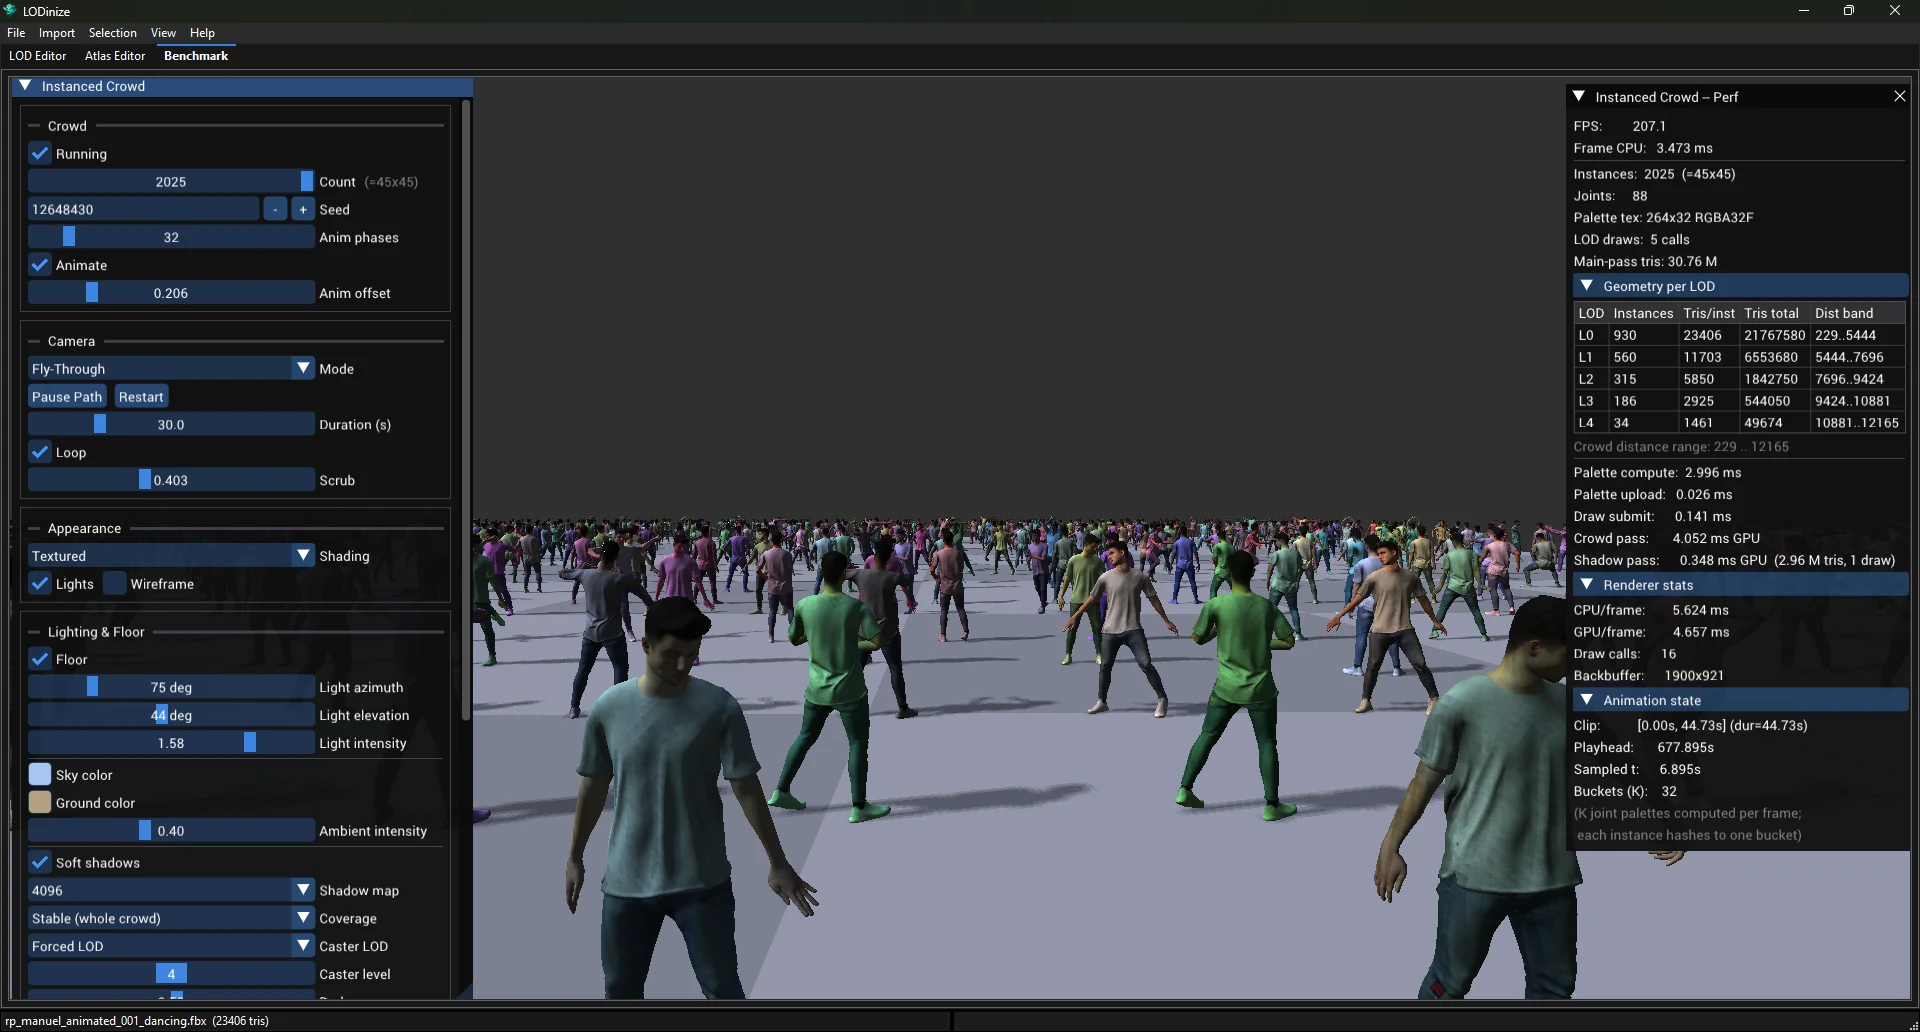
Load it up. Drag Count to its end (2 025 instances) and tick
Unlimited FPS. Textured shading, Soft shadows
and the Fly-Through camera are already on by default.
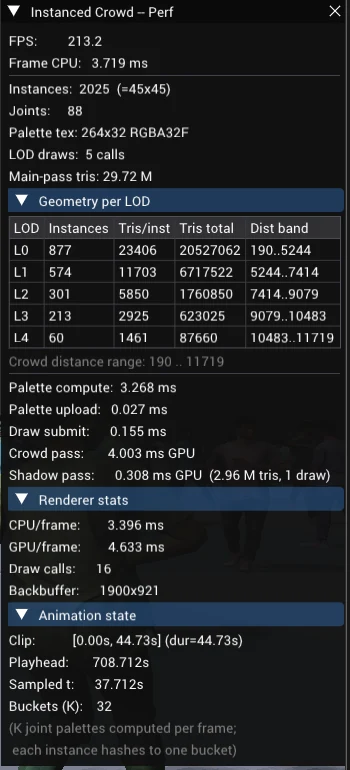
Read the numbers. In the example below: about 207 FPS with 30.8 million triangles in the main
pass; with the camera inside the crowd, 1 805 of the 2 025 instances used LOD 0–2.
An example setting: cheaper shadows
Shadows are seen at low resolution, so the geometry that casts them does not need to be detailed. In the
example, the instances used Auto LOD for drawing, while the shadow casters were set to
Forced LOD with level 4 everywhere (shadow map 4096, coverage "Stable (whole crowd)"). The
shadow pass then took about 0.3 ms for the whole crowd. The defaults cast from the same LOD 4 but use
"Focused (crisp close-ups)" coverage, for sharper shadows near the camera.
Your numbers will differ. Frame rates depend on the graphics card, the resolution,
the character and your LOD set. Use the benchmark to compare LOD sets and settings with each other on the
same machine.