The two viewports, the camera, shading and heatmap modes, playback and the clip list — everything you use to look at a LOD and judge it.
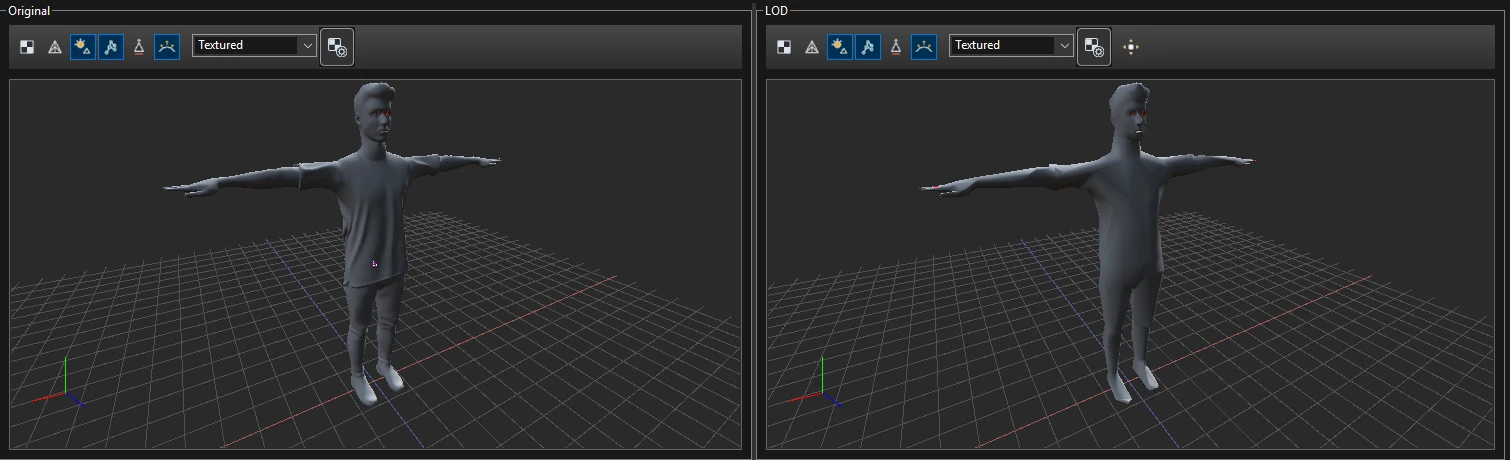
The left viewport always shows the original mesh; the right one shows the level selected in the LOD table. Both play the same animation frame and share one camera, so any difference you see is the LOD.
The toolbar above the viewports has Fit to window, Joints basis (joint axes), Show grid, and the layout choice Single view / Side by side.
| Mouse | Action |
|---|---|
| Left-drag | Orbit |
| Right-drag | Pan |
| Wheel | Zoom. Close to the mesh the steps can be large — one or two notches at a time. |
Camera sensitivity and behaviour are configured in Settings > Navigation.
Each viewport has its own toolbar, so the original and the LOD can be shown differently (for example textured original, heatmap LOD):
| Button | Purpose |
|---|---|
| Texturing | Show the character's texture. If the shading box says Textured but the mesh is grey, turn this on. |
| Wireframe | Overlay the triangle edges — shows where the simplifier kept detail. |
| Lights | Lit or flat shading. |
| Skeleton rendering | Draw the joints and bones. |
| Face culling | Hide back faces. |
| Smooth Normals | Recompute smooth vertex normals for display. |
| Shading box | See Shading modes. |
| Padded (LOD viewport) | Show the texture repaired in the Atlas Editor instead of the original. |
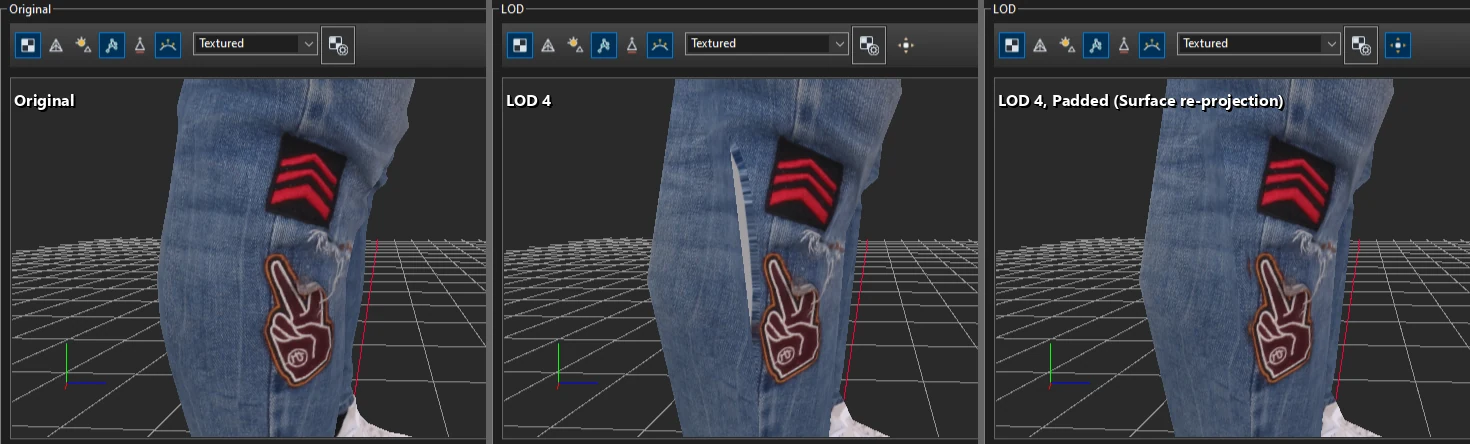
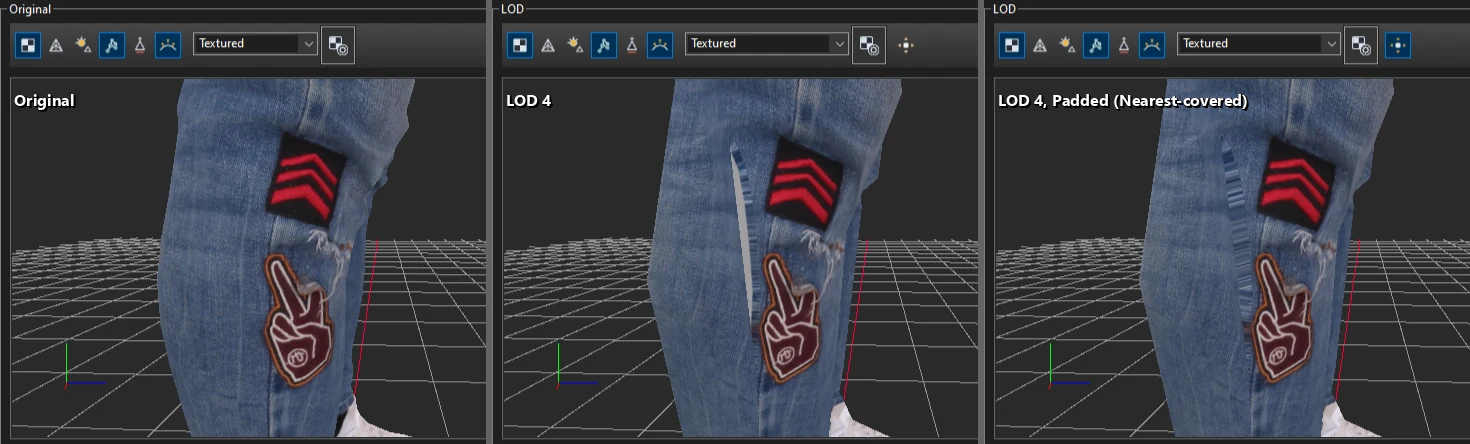
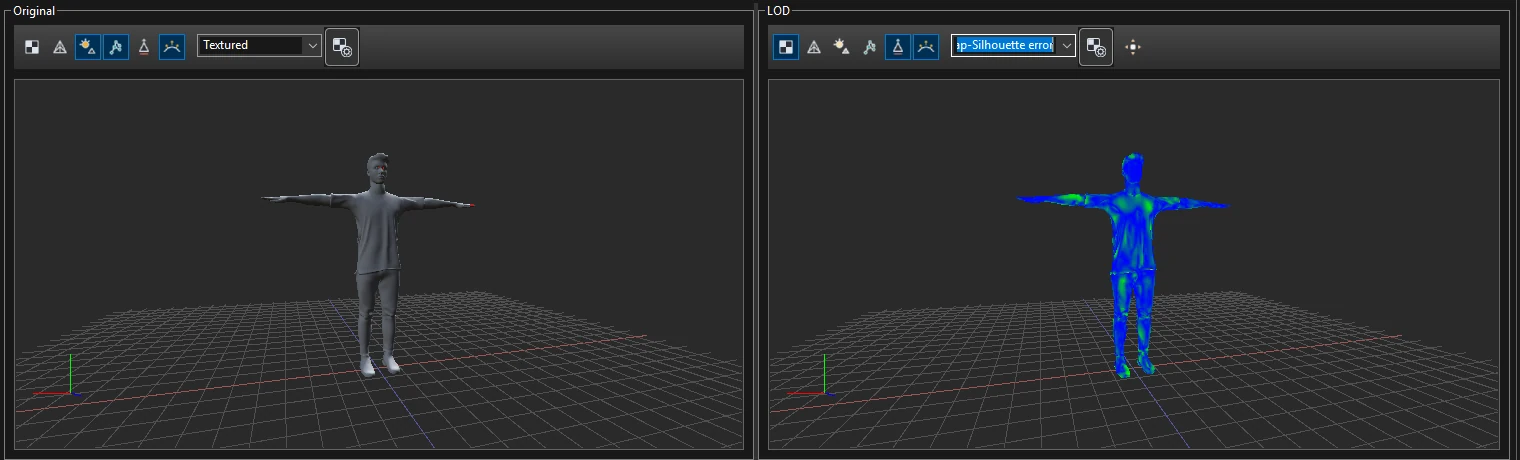
The shading box of the LOD viewport offers Textured, Checkerboard (reveals UV stretching), Normals, and two heatmaps:
Blue is little deviation; green, yellow and red are progressively more. The colour range is set in Settings > Silhouette error visualization.
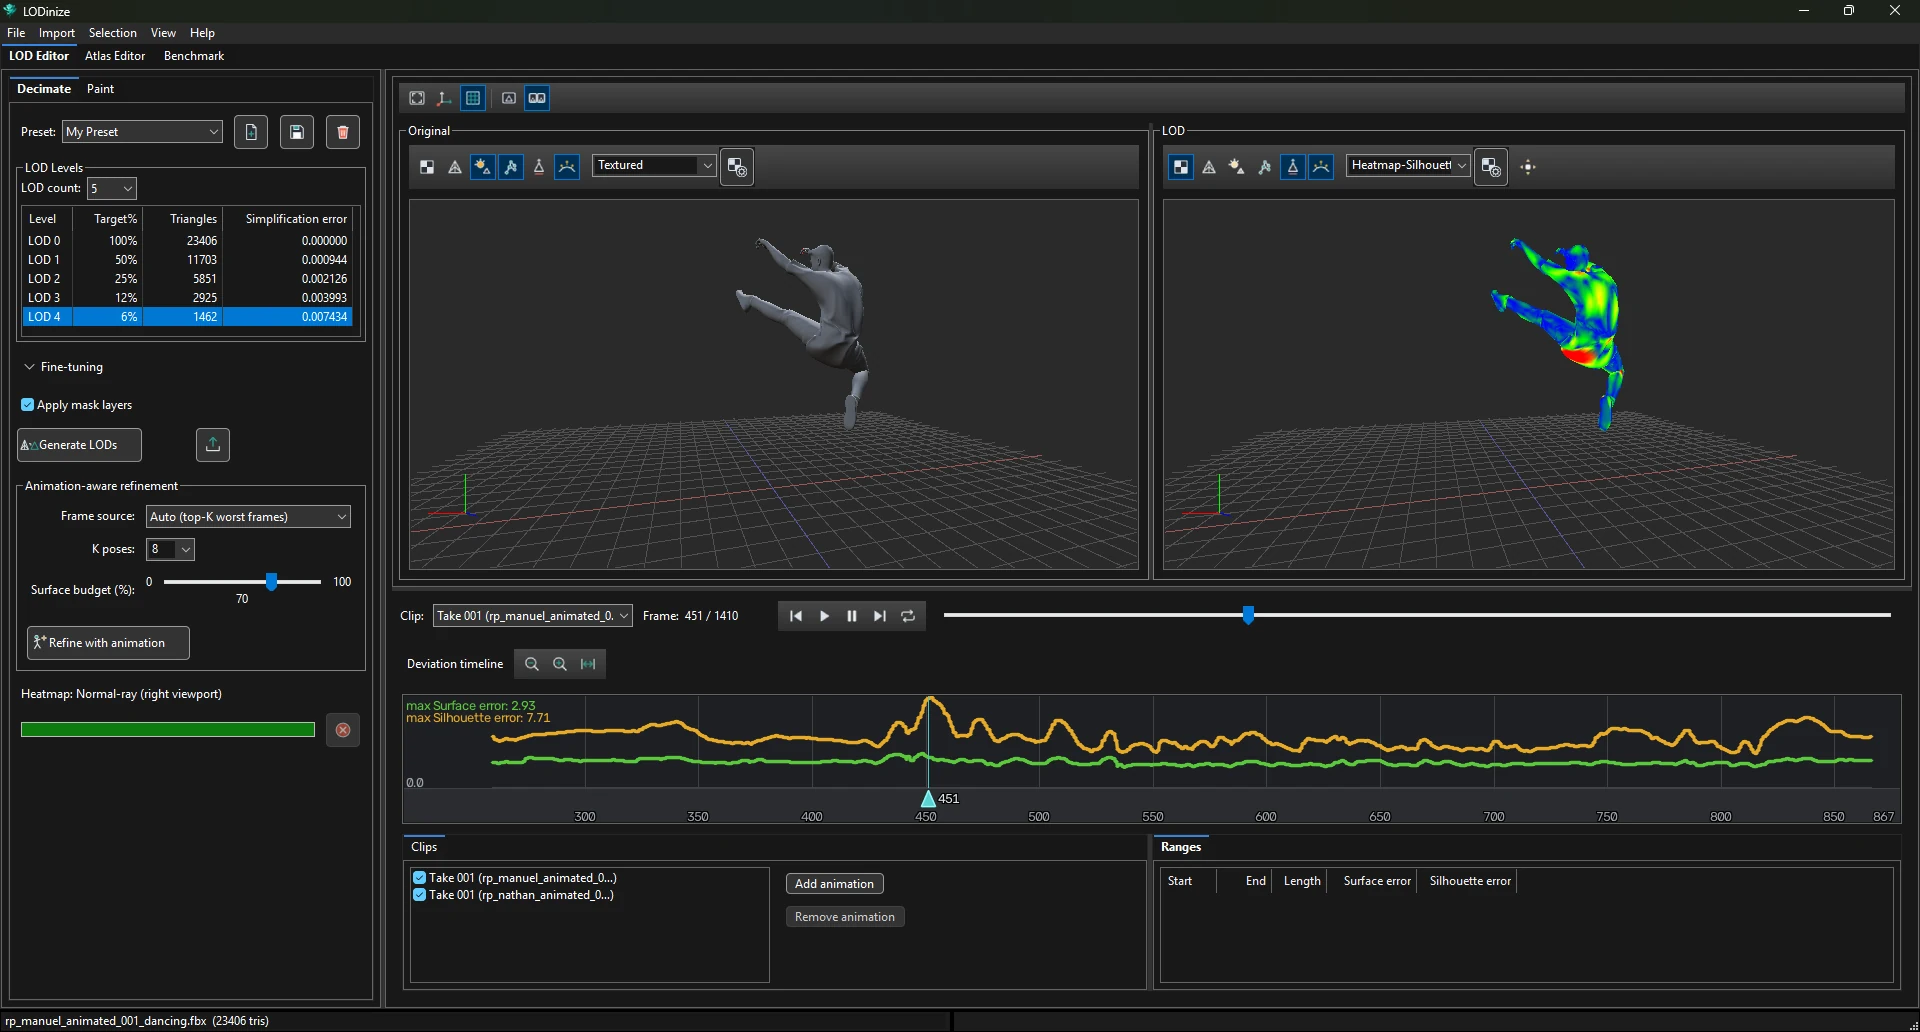
The playback bar has the Clip dropdown, the frame counter, previous / play / pause / next / loop, and a frame slider. The deviation timeline below it is covered in Animation-aware refinement.

